Table of Contents
Forwarding Windows Printer Events to Splunk
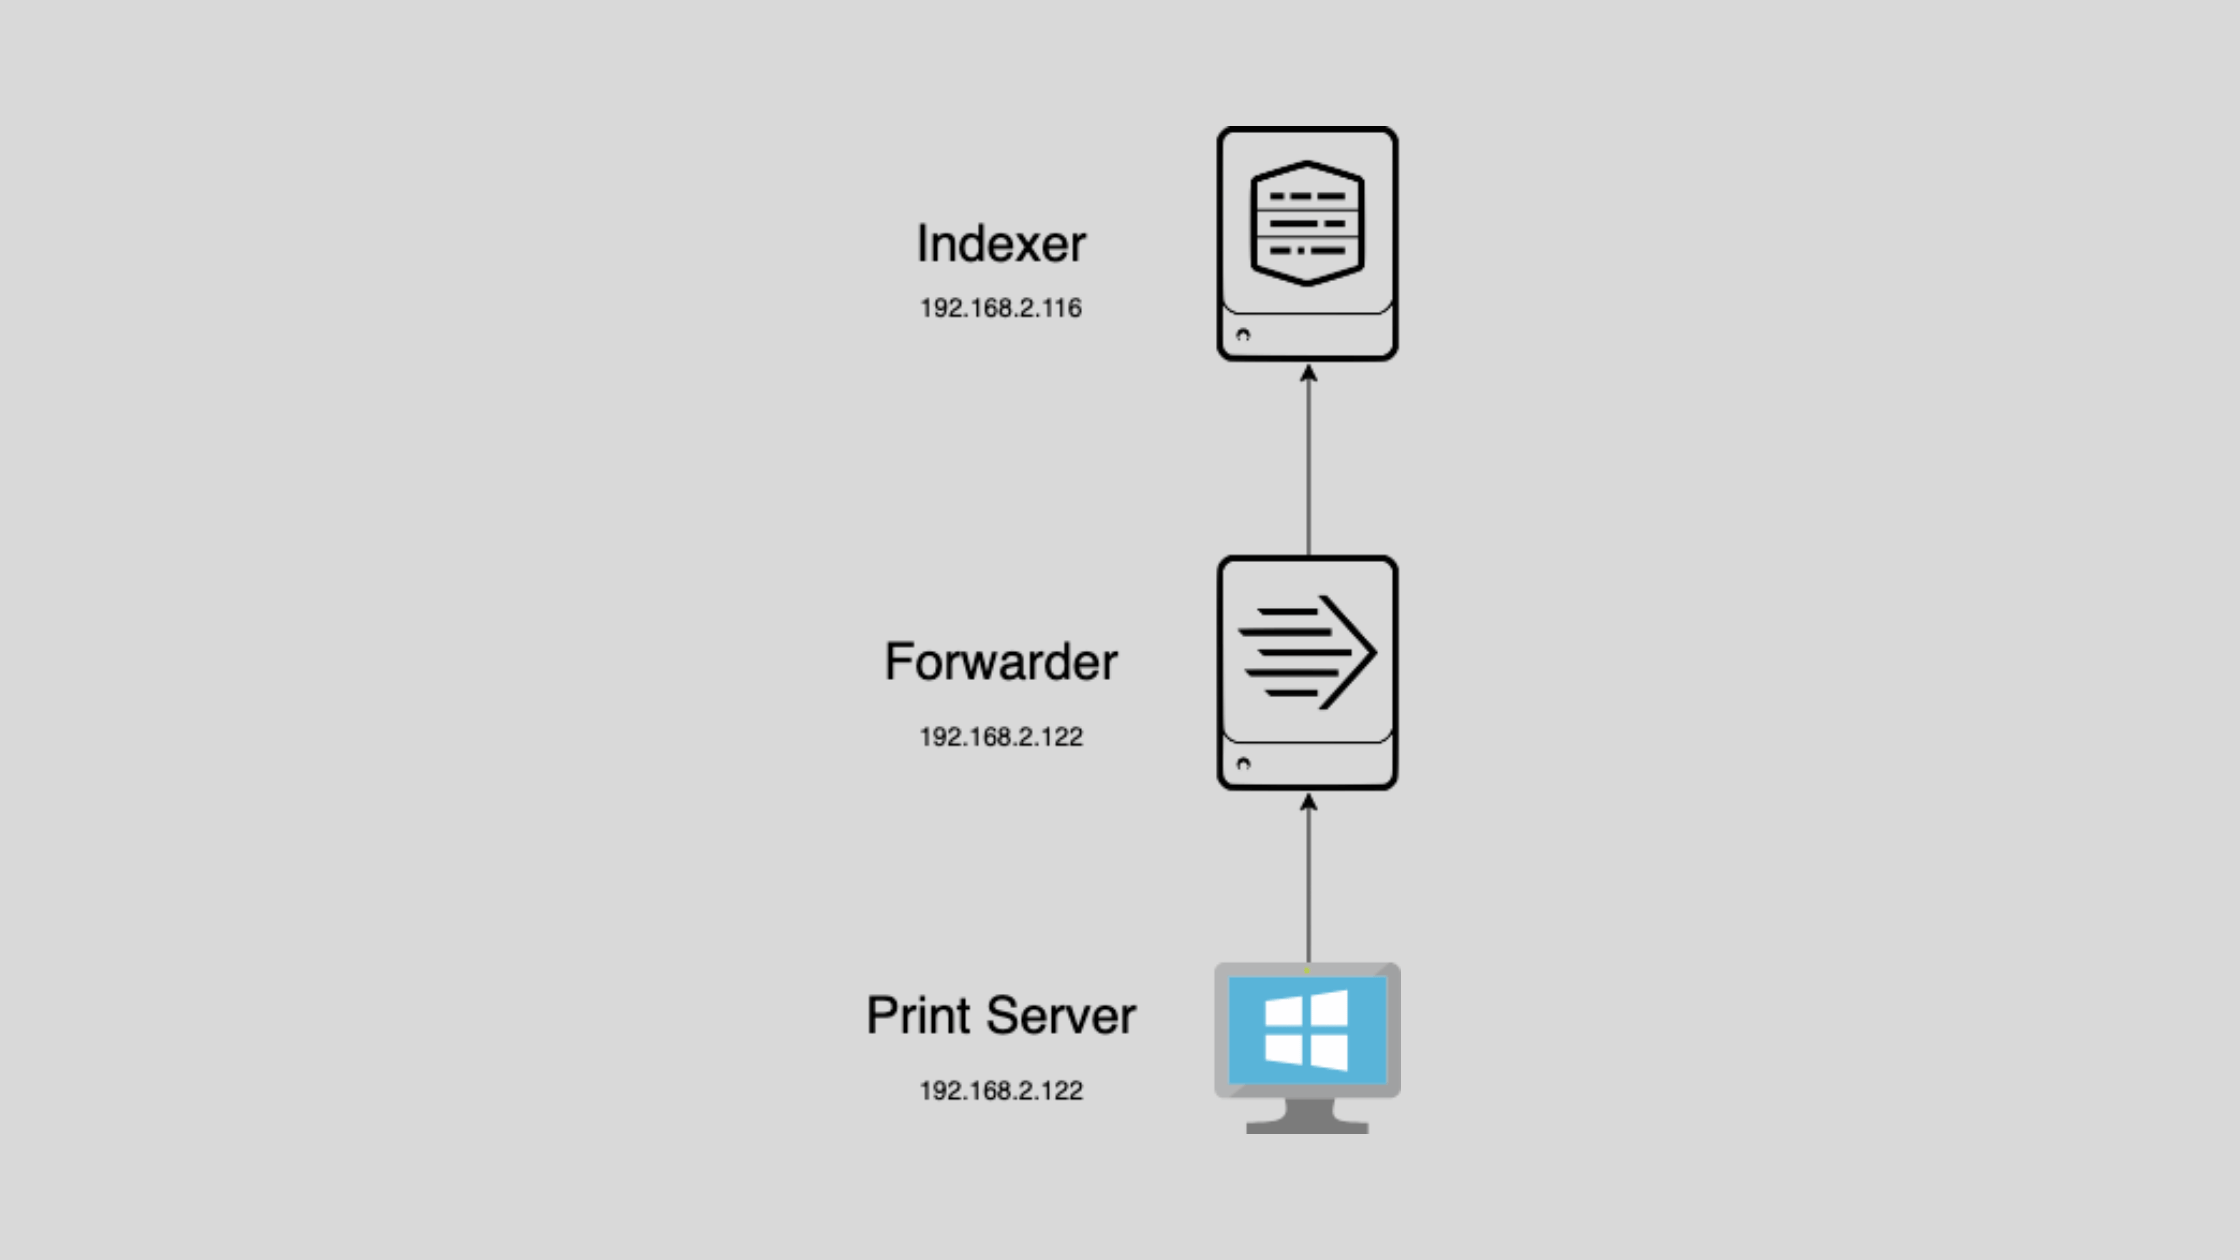
In this blog post, you will learn how to forward Windows printer events to Splunk, a powerful data platform for monitoring and analyzing machine data. By capturing print job details like printer name, user, document name, and job ID, you can gain valuable insights into your printing environment. This allows you to track print volumes, troubleshoot issues, make informed decisions about printer resources, and control user access to print job data in Splunk. We'll walk through the steps to configure your Splunk indexer to receive the events and set up the Windows print server to send them. Let's get started!
Configuring Receiver on Splunk Indexer
Before we can start forwarding Windows print events to Splunk, we need to set up a receiver on the Splunk indexer. This involves creating an index to store the print job data. While you can use an existing index, it's often beneficial to create a dedicated index for this purpose, especially in environments with high print volumes.
Creating a Dedicated Index
To create a new index in Splunk Cloud or Splunk Enterprise, follow these steps:
Go to Settings > Indexes.
Click on the "New Index" button in the upper right corner.
Provide a name for your index, such as "printjobs".
Specify any other desired index settings, like retention period and data type.
Save the new index configuration.
Note: Using a separate index for print job data offers several advantages:
Better control over retention periods and disk usage
Easier data segregation for access control and searching
Improved performance by avoiding mixing print data with other event types
Configuring Windows Machine to Forward Printer Events to Splunk
Now that we have our Splunk indexer set up to receive print job events, let's configure the Windows print server to forward these events to Splunk. We'll be using the Splunk Universal Forwarder, which is a lightweight agent that can be installed on the Windows server to send data to the indexer.
Prerequisites
Before proceeding, ensure that you have the following:
A Windows server with the print server role installed
Connectivity between the Windows server and the Splunk indexer
Configuring the Splunk Universal Forwarder
To configure the Splunk Universal Forwarder to send print job events, we need to modify the inputs.conf file. This file specifies the data inputs and their associated settings.
1. Navigate to the inputs.conf file located at C:\Program Files\SplunkUniversalForwarder\etc\apps\search\local\.
2. Open the inputs.conf file using a text editor.
3. Add the following stanza to the file:
[WinPrintMon://jobs]
disabled = 0
index = printjobs
type = jobs
interval = 60
baseline = 0
4. Let's break down each setting in the stanza:
- [WinPrintMon://jobs]: This specifies the input type as Windows Print Monitor, focusing on print jobs.
- disabled = 0: Ensures that the input is enabled.
- index = printjobs: Sets the destination index for the print job events.
- type = jobs: Specifies that we want to capture print job events (other options include printers, drivers, and ports).
- interval = 60: Sets the interval (in seconds) at which the forwarder checks for new print job events.
- baseline = 0: Disables baselining of printer objects and their jobs.
5. Save the inputs.conf file.
Restarting the Splunk Universal Forwarder
For the changes to take effect, we need to restart the Splunk Universal Forwarder service.
1. Open a command prompt or PowerShell window.
2. Navigate to the Splunk Universal Forwarder's bin directory:
cd "C:\Program Files\SplunkUniversalForwarder\bin"3. Run the following command to restart the forwarder:
splunk restartThe Splunk Universal Forwarder will now start monitoring print job events and forwarding them to the specified Splunk indexer.
Testing the Configuration
To verify that print job events are being captured and forwarded correctly:
1. Submit a test print job to one of the printers managed by the Windows print server.
2. In your Splunk web interface, navigate to the "Search & Reporting" app.
3. Run the following search query to retrieve print job events:
index = printjobs4. Review the search results to confirm that the print job event details are being captured, including information like printer name, user, document name, and job ID.
By following these steps, you have successfully configured your Windows print server to forward print job events to Splunk. This setup enables you to monitor and analyze your printing environment, providing valuable insights for troubleshooting, resource planning, and security purposes.
We hope this article helps understand how to forward Windows printer events to other Splunk components.
That's all for now, we will cover more informative topic about the Splunk in the up coming articles. Please keep visiting thesecmaster.com for more such technical information. Visit our social media page on Facebook, Instagram, LinkedIn, Twitter, Telegram, Tumblr, & Medium and subscribe to receive information like this.
You may also like these articles:
Arun KL
Arun KL is a cybersecurity professional with 15+ years of experience in IT infrastructure, cloud security, vulnerability management, Penetration Testing, security operations, and incident response. He is adept at designing and implementing robust security solutions to safeguard systems and data. Arun holds multiple industry certifications including CCNA, CCNA Security, RHCE, CEH, and AWS Security.
