Table of Contents
How To Investigate An Email ID Using Mosint?
Email has become one of the most popular means of communication, especially in the business world. Despite its many benefits, the email also has some disadvantages that can impact productivity and effectiveness. One of the biggest disadvantages is its susceptibility to cyber-attacks. Cyberattacks are becoming more and more common, and email is often the gateway that attackers use to gain access to a company’s network. Once they have access, they can wreak havoc by stealing data, deleting files, or even taking over the entire network. Email IDs are also considered one of the markable Indicators of Compromise (IoCs) in the Cybersecurity landscape. It is not just important to know how to investigate an email ID, however, it is necessary to know. There are several tools and techniques to investigate an email ID, but, we are going to introduce you to one such email investigation tool, Mosint in this post. Let’s see how to investigate an email ID using Mosint, an efficient email information gathering tool for email reconnaissance.
What Is Mosint?
Mosint is an OSINT (Open-Source Intelligence) tool for emails. This email information-gathering tool is a good source of email reconnaissance. It gathers most of the publicly available information about the targeted email ID from multiple sources such as Holehe OSINT, email-verifier, FastHTTP, Simple Email Reputation, and more. The tool is part of the default packages in Kali Linux, however, if you don’t find it preinstalled, then you can download it from the public GitHub repository. Since Mosint is developed in Golang and it’s libraries are developed in Python, you should have both Python and Golang installed on your system.
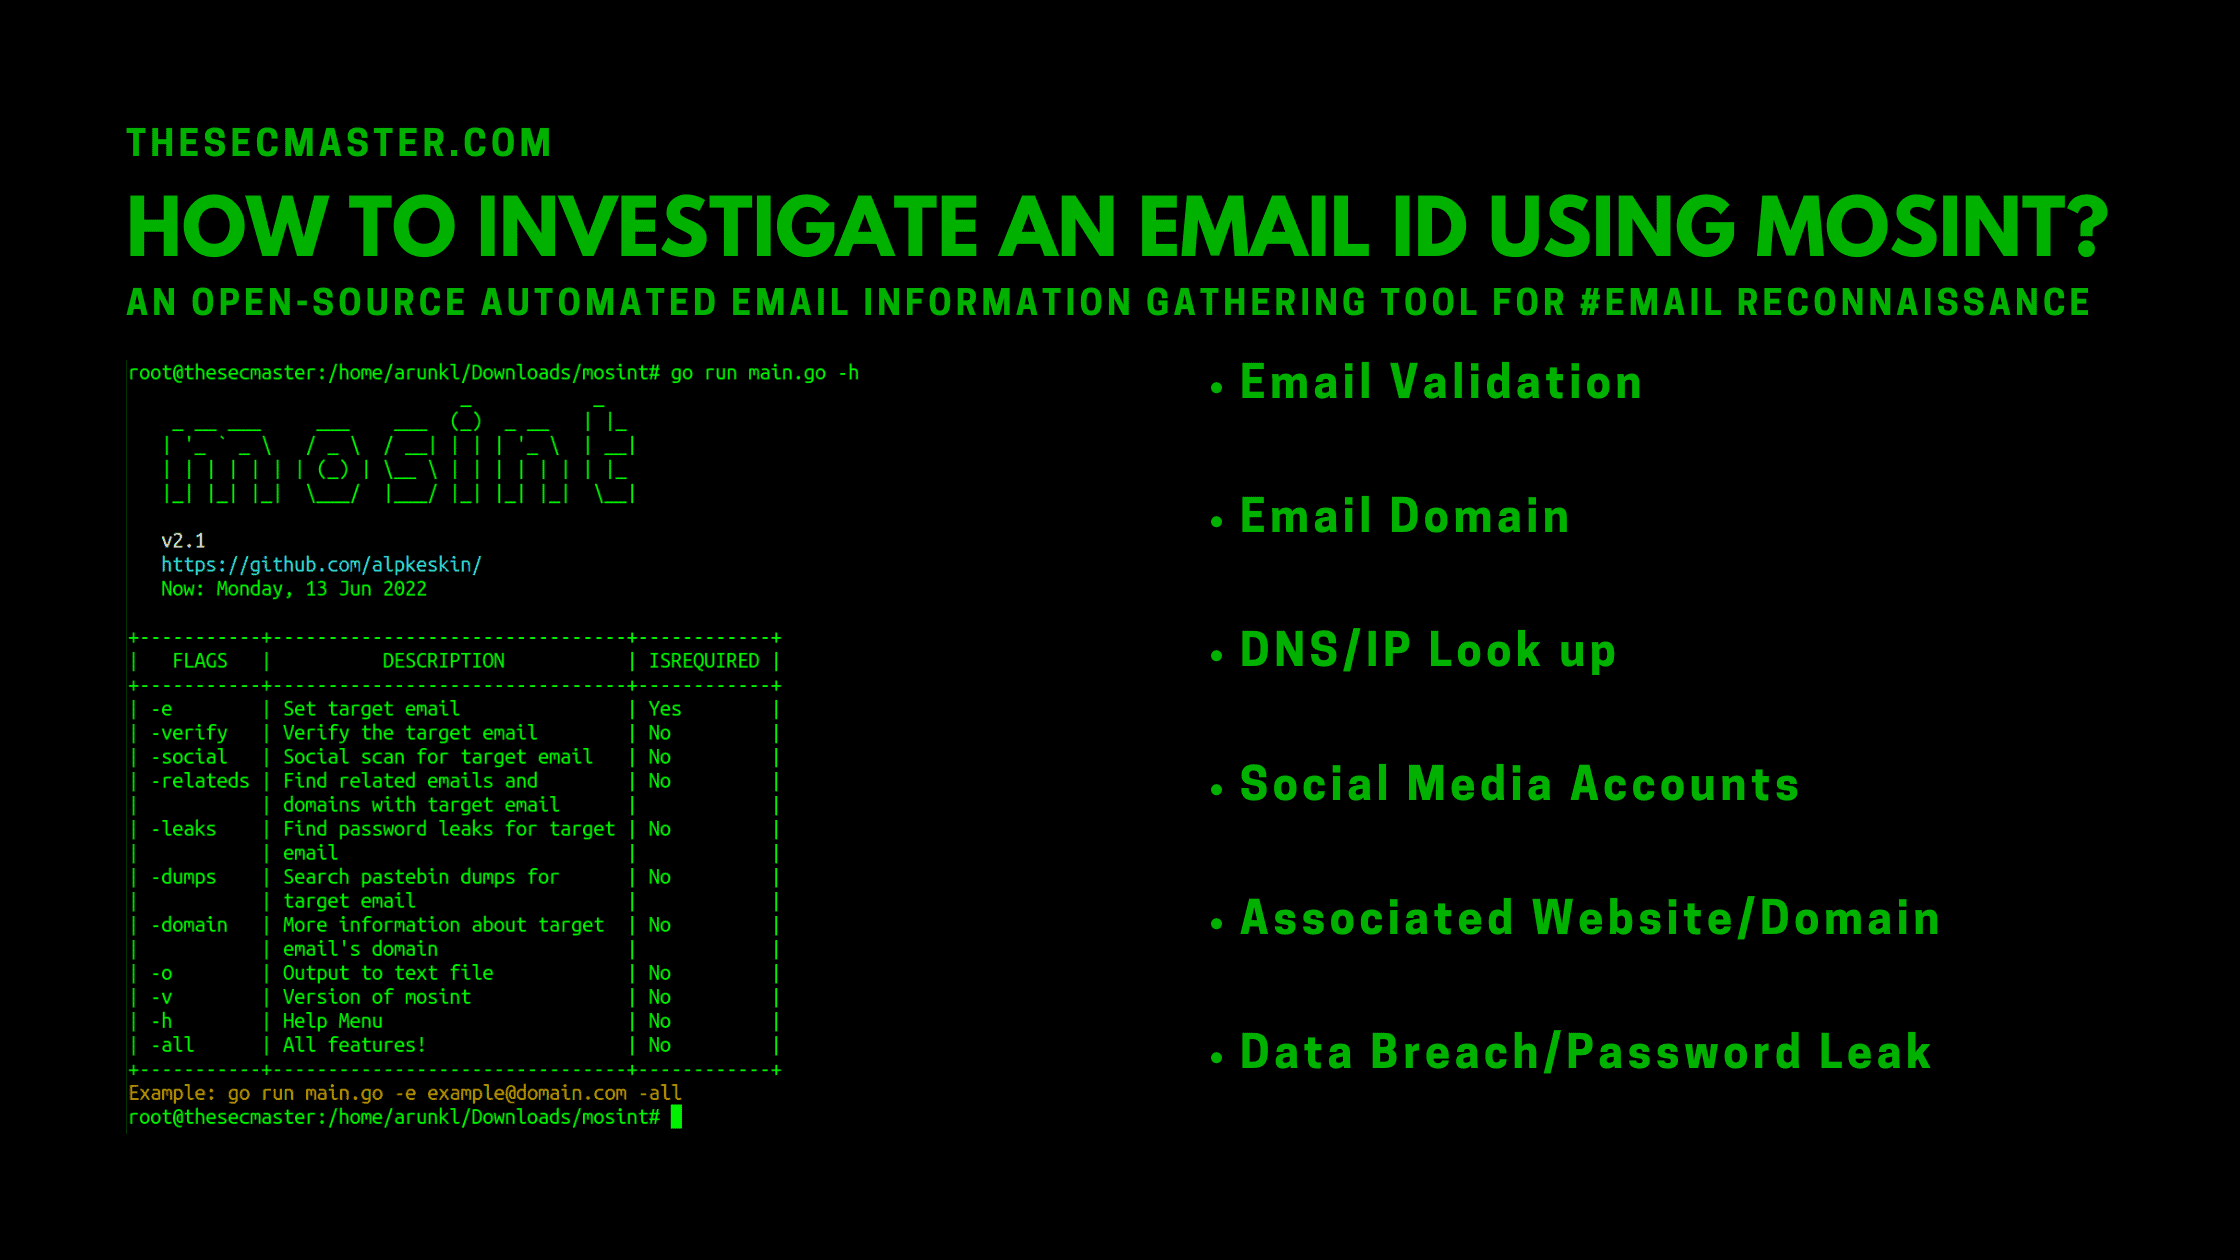
We can gather this information about the targeted email ID:
Email Validation
Email Domain
DNS/IP Lookup
Social Media Accounts
Associated Website/Domain
Data Breach/Password Leak
How To Investigate An Email ID Using Mosint?
Before we show you how to investigate an email ID using Mosint, it is required to work on the prerequisites to run/install the tool. Since this tool is built in Golang that uses Python libraries, it is a must to have Python3 and Golang on your Linux machine. If you are a Kali Linux user, you can skip the installation step as everything is preloaded on Kali Linux.
Step 1: Check your machine has Python installed
To check this, just try checking the version of the Python on your machine.
$ sudo python3 –version
Well, Python is part of the default installation package in all the known Linux distributions. If not, then follow this process to install Python on your Linux.
Step 2: Check your machine has Golang installed
Run this command to check the version of the Golang.
$ sudo go version
If Golang is not installed yet, run this command to install Golang on your Ubuntu based Linux distributions.
$ sudo apt install golang-go
Step 3: Download/Clone Mosint from Git
Download Mosint from the Git Page or clone using the below command:
# sudo git clone https://github.com/alpkeskin/mosint.git
Step 4: Install the required Python packages to run Mosint
Required Python packages are listed in requirements.txt file inside the mosint directory.
Change directory to mosint. there you will see a file named requirements.txt. Use this pip3 command to install the packages listed in the file
$ sudo pip3 install -r requirements.txt
Step 5: Run Mosint tool for the first time
It is good to run Mosint’s help at first. It downloads all the required tools and scripts to run the tool. As we have said that Mosint is built using Golang, runs the main.go file using Golnag. You will see the Mosint’s flags table upon downloading the tools and scripts.
$ go run main.go -h
Step 6: Verify the targeted email ID
As part of the investigation process, the first option is to verify the email ID is a valid email ID. Run this command with -verify flag for the email ID.
$ go run main.go -e wcole9953@gmail.com -verify
The result shows that the email ID is a valid email ID, which is not a temporary or disposable email ID.
The result could be not accurate since no API Keys are set for the source tools. We recommend setting the API key for accurate results. The API keys for the tools can be updated in the keys.json file. You can use any text editor to edit the keys.json file.
$ nano keys.json
After the update of the API keys, Press Ctrl + O to write the file and Ctrl + X to exit the file.
Step 7: How to check the social media accounts associated with the email ID
Run the same command with -social flag.
$ go run main.go -e wcole9953@gmail.com -social
Step 8: Check the related emails and domains associated with the email ID
Run the same command with -relateds flag.
$ go run main.go -e wcole9953@gmail.com -relateds
Step 9: How to use all the flags in a simgle command and store the output to a file
Use -all flag to use all the flags at once and use -o switch to save the output to a file.
$ go run main.go -e wcole9953@gmail.com -all -o wcole9953.txt
We hope this post would help you know how to investigate an email ID using Mosint, an efficient email information gathering tool for email reconnaissance. Thanks for reading this post. Please share this post and help to secure the digital world. Visit our social media page on Facebook, LinkedIn, Twitter, Telegram, Tumblr, Medium & Instagram, and subscribe to receive updates like this.
You may also like these articles:
Arun KL
Arun KL is a cybersecurity professional with 15+ years of experience in IT infrastructure, cloud security, vulnerability management, Penetration Testing, security operations, and incident response. He is adept at designing and implementing robust security solutions to safeguard systems and data. Arun holds multiple industry certifications including CCNA, CCNA Security, RHCE, CEH, and AWS Security.
